Today, I am sharing cards I made using the Lifetime of Love Bundle by Stampin’ Up! I designed these cards, as somewhat of a challenge. Let me explain what I mean by that. I received a bundle chosen by my team leader and I had to create three cards using that bundle. No big deal, right? Well, I have to admit, this was a bundle that wasn’t on my radar…not even a little. But once, I started using it, that all changed!
The Lifetime of Love Bundle is perfect for occasions such as engagement, wedding, anniversary or just to say “love you.” I used Very Vanilla, Gold Foil, and Nature’s Sweetness Specialty Designer Series Paper. To add texture and dimension, I chose to dry emboss using the Distressed Tile 3D Embossing Folder.
Lifetime of love bundle: Congratulations on Your Wedding Day

Images copyright 1990-2024 Stampin’ Up!®
This wedding card was effortless to make and turned out to be my favorite of the three cards! The goal for my first card was “simple, but elegant.” I used Very Vanilla Thick for the card base. Next, I added a layer of Very Vanilla and dry embossed the layer using the Distressed Tile 3D Embossing Folder. For the floral die cut, I used a Gold Foil sheet. I heat embossed the sentiments using Versamark Ink and Gold Embossing Powder. The Iridescent Foil Gems were perfect to add a soft touch of “bling.”
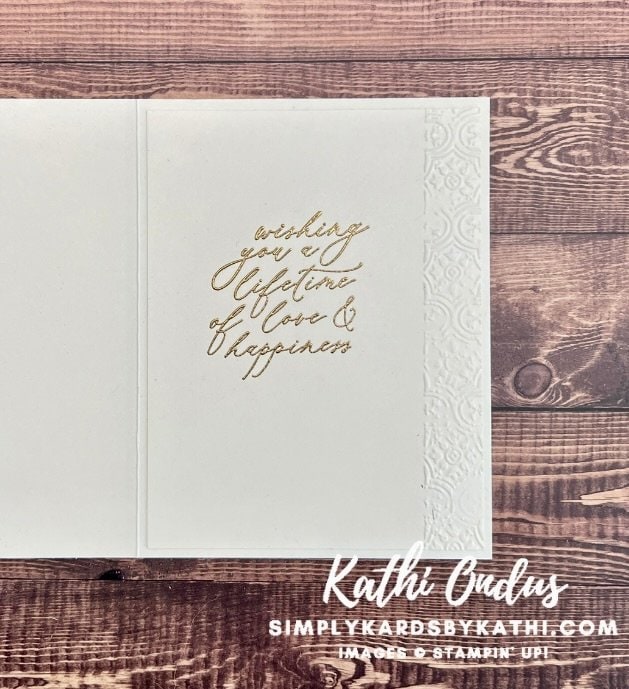
For the inside, I added a layer of Very Vanilla. To maintain the simplicity and elegance, I dry embossed the right edge of the layer. For the inside sentiment, I heat embossed using Gold Embossing Powder.
Images copyright 1990-2024 Stampin’ Up!®
lifetime of love bundle: Love You Card

Images copyright 1990-2024 Stampin’ Up!®
Above, I used several layers, pairing Very Vanilla with Pebbled Path, Nature’s Sweetness Specialty Designer Series Paper and gold foil. First, I added an embossed layer of Very Vanilla to a layer of Pebbled Path. Next, I added a partial layer of Nature’s Sweetness Designer Series Paper to the lower portion of the embossed layer. I love the richness of this paper with the inlayed gold script. To finish off the edge of the layer, I decided to add a 1/4″ strip of Pebbled Path. I embossed the sentiment with Gold Embossing Powder.

For my focal point, I used the round die cut with leaves from gold foil. In the center, I popped up a die cut flower and leaves. I added a gold bow using Simply Elegant Trim and Iridescent Foil Gems for embellishments.
Images copyright 1990-2024 Stampin’ Up!®
On the inside, I layered Very Vanilla and Pebbled Path. Next, I added a 1/2″ strip of Gold Foil and a 3/8″ strip of Designer Series Paper to the edge.
For the inside sentiment, I heat embossed using Gold Embossing Powder.

Images copyright 1990-2024 Stampin’ Up!®
In the video below, I’ll demonstrate how to make both cards with some tips for using foil die cuts. Further down in the post, there is a third card. You will, also, find supplies and a link to download a PDF with photos, measurements and supplies. I would love your thoughts on the Lifetime of Love Bundle and cards! Leave me a comment, below!

Images copyright 1990-2024 Stampin’ Up!®
supplies
Stay Up To Date
If you are looking for some inspiration and ideas for crafting, 2-3 free downloadable tutorials per week and staying up-to-date on Stampin’ Up! products and news, sign up to receive my weekly newsletter. You can find the sign up form either in the right hand column of each post, the bottom of each page, or on my “Home” Page.
Do you want to be notified when I publish a new post? If so, subscribe to my blog for updates on new posts. You can find this at the bottom of the “Home” Page.
Earn a free stamp set/supplies when you purchase from me using my current Host Code which can be found in the right hand column of the page. Keep up-to-date on Stampin’ Up! Promotions and Specials. Click the buttons below to learn more.


Elegant cards!